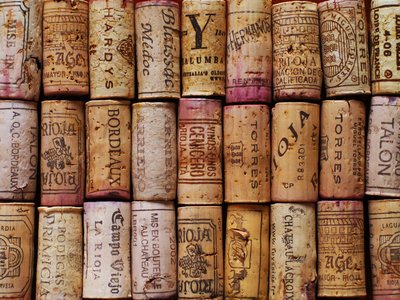
After a relaxing trip to enjoy the vineyards this autumn, you may find yourself left with wine bottles and corks to spare. Instead of recycling them, try upcycling bottles and corks and turn them into something new and useful! Wine bottles can be easily decorated and turned into themed centerpieces, and can even serve as impromptu vases. Be sure to wash wine bottles thoroughly before using them for other purposes. If you wish to remove any labels on the bottles, heat the bottle in a pot of hot water (not boiling) for about 15 minutes, then scrape the label off. Corks on the other hand are more difficult to clean and reuse. Put several hours aside in advance of a cork craft in order to soak the corks for a few hours, and to allow them to dry for about an hour to remove any odors they may have absorbed. Still, if you are looking to create a one of a kind gift for a wine lover in your life, the time is worth it, and there are many variations on crafts such as these to explore!
Wine Bottle Tiki Torches
Materials:
- Clear wine bottles
- Marbles or glass stones
- Tiki fuel
- Tiki refill wicks
- 3/8 x 1/4 brass coupling
Fill the wine bottle about 1/3 of the way with marbles or glass stones. Then, fill the rest of the bottle with tiki fuel. Take the coupling and insert the wick through it, then put the wick in the bottle so that the coupling keeps part of the wick above the top of the bottle. Light the top of the wick when you are ready, and use these torches as a great table accent at your next party!
Wine Cork Board
Materials:
- Plenty of wine corks
- A steak knife
- Wood glue
- A hot glue gun with hot glue sticks
- Plywood
- Paint
- Paintbrushes
First, get rid of the wine smell from the corks by soaking them in water and white vinegar mix for a few hours, then let them sit for an hour to dry. When the corks are dry, carefully cut them lengthwise with a steak knife, and arrange them by size or color if desired. Next, assemble the frame by buying a piece of plywood and cutting it to the size and shape you desire. If you would like, paint the frame at this point to create an accentuating background for the corks. Lastly, glue the corks to the board in any pattern by using the hot glue gun – try alternating the direction, sizes, and shapes of the corks, but be sure to not leave any spaces between them. Hang your new cork board, and pin your photos and pictures!
3D Cork Art
Materials:
- Lots of wine corks
- Hot glue gun with hot glue sticks
- Stencils
- Paper
- Pencils
3D cork art can take many forms – including a freestanding sign, or an art piece that can be hung on the wall. To keep yourself organized, draw the 2D design that you would like to replicate, such as a heart, star, or letter, on a piece of paper freehand or by using a stencil. Then, arrange the corks standing up inside the shape so that they are touching one another. Once you are satisfied with how they look, begin gluing the corks together with hot glue, and allow it to sit for ten minutes after assembling the entire figure. Then, allow it to stand or sit freely as an art piece, or hang it on the wall for unique textured décor.
Themed Centerpieces
Materials:
- Wine bottles
- Spray paint
- Ribbon
The easiest way to paint old wine bottles is to spray them down with spray paint in a well-ventilated area or outdoors. Consider going with a theme, and use your favorite sports team’s colors or a color scheme in your room. Then, cut a piece of ribbon and tie it around the neck of the bottle, or around the middle of the bottle to enhance color blocking or stripes. You can even make a classy Halloween centerpiece by painting the bottles with white, orange, and yellow stripes for candy cane bottles!


