
Homeowner How To: DIY Furniture Refinishing
You’re driving along the back roads on the way home and happen upon a promising yard sale. This simple little dresser sits there, beckoning you from the side of the road. Instinct takes over and you pull over to peer at the items on display. Your mind says, “That is exactly the type of piece I have been searching for, for little Timmy’s room! No harm in just taking a peek.” So you hop out of the car, with little Timmy in tow and amble up to the cute, little four drawer dresser. You notice that it’s solid wood. The drawers are wood and seem well made. It’s really kind of cute. But the color is just terrible and it is a bit grungy. It would need to be completely re-finished. Is it worth it? How much time will it take to paint it? Will it hold up when it’s all done? What is the best way to paint wood furniture so that it lasts?
 Giving found treasures a chic new lease on life is a great way to add practical, personalized style to your home décor on a budget. After the large expense of finishing a major home improvement project or renovation, you may just want a few inexpensive pieces to get you through until you can afford to purchase the furniture of your dreams. While refinishing furniture can seem like a daunting task, if you do it right the first time around, it can last for years and years and you may find that you really love the authentic feeling of older pieces mixed in with the new after all. Refurbishing older pieces of furniture can add an authentic sense of style to your home and save perfectly good furniture from heading to the dumps for no good reason. So you can feel good about your green, cost conscious and fun refinishing project.
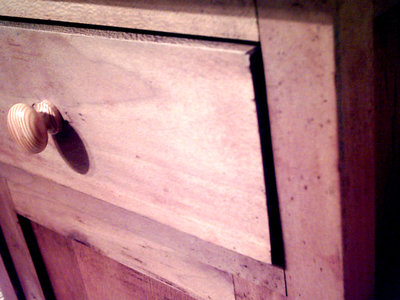
Painting a piece like this 4 drawer dresser, will only require a few simple and inexpensive items and won’t take much time at all compared to how many years you will get to enjoy it. You will want to inspect it well, especially the drawers inside and underneath before you purchase a piece like this. Make sure the drawers work smoothly. Look to see if hardware like hinges or drawer guides are in good shape. Missing pieces will be hard to replace, so unless you are really in love with it, best not to purchase a used piece with too many issues, large cracks, bowed sides or missing internal hardware.
 The first thing you will want to do is to clean it up really well. Take out the drawers and stand the dresser in a sunny, outdoor area. Wash down the entire wood piece in and out with a diluted light bleach solution to remove all dirt and greasy residue. Let it stand out in the sun for a few hours so the bleach really activates and gets into the pores of the wood. Then rinse it down with very hot water and let it dry for at least 24 hours.
Once it’s all clean, take a sanding block or fine sandpaper and rough up that finish coat just enough to give the paint a good surface to stick to. Then wipe down all the dust and let it dry well. If it is a really funky finish you may need to prime it, but for the most part a standard, quality wall paint with built in primer, like Valspar’s Signature Paint from Lowes should cover everything quite well. Go for a satin or eggshell finish to give the piece a great durable and washable finish.
Remove the hardware and tape off the edges where the drawer meets the drawer box inside to give you a nice clean paint job. Make sure to move the piece indoors before you start painting to ensure you don’t wind up with random dirt, dust, leaves or grass clippings sticking to your newly painted piece. As you apply the paint, be sure to use nice even strokes with a quality paint brush for those hard to reach corners and use a good foam roller to get nice even coverage on the rest of the piece. Let the first coat dry thoroughly and then apply a second coat and let that dry well. Congratulations! You’ve successfully re-finished a beautiful new dresser! You can use this process with any type of wood furniture, so keep your eyes peeled for great finds.
You can add a bit of personal flair by using different types of colorful wallpaper or contact paper as fun and funky drawer liners. Change out the pulls or knobs to something that matches the rest of the room décor and adds a fun, colorful twist to the piece. Add some interesting style by using a simple stencil in matching gloss paint to give it a rich detail, tone on tone look and some showroom quality style. Have fun and use your imagination. It’s always so satisfying to see what your hard work can do to turn that old piece of furniture into a treasure you and your family will love for many years to come.
More DIY and Color: